Build Log
Make a thermal carafe out of leftover parts and trash!
A thermos (or "vacuum flask") works by blocking heat transfer in three ways: simply sealing up the contents blocks convection; a vacuum between the inside of the bottle and the outer wall prevents conduction of heat; and a mirrored lining reflects radiation. (For a more complete explanation, see how a thermos works at HowStuffWorks.com.
Vacuums are kind of difficult to produce, so our carafe will use foam insulation instead. And mirroring a surface is also pretty hard to do, so we'll just use aluminum foil.
Here are the materials necessary to build the slapdash thermal carafe:
- Two plastic bottles: one larger, one smaller. (I used a 2 liter bottle and a 34-oz bottle).
- A sheet of aluminum foil about 24 inches long.
- Expanding insulation foam, such as the kind used to seal cracks around windows and doors. (Warning: this is messy stuff.)
- (You might be able to substitute finely-chopped styrofoam packing peanunts; I haven't tried.)
- Optional: tape and craft foam (such as the type used in the dalek project, photo 1, item "I").
Tools used:
- Razor saw, or a similar fine-toothed saw.
- X-acto knife or other sharp knife.
- Scissors.
- Plenty of rags and newspapers to contain the mess.
- Gloves, goggles, and other protective equipment
Warnings:
- Obviously, with so many sharp objects in use, this is not a project for children or careless people.
- Expandy foam (I used Great Stuff brand) is very sticky. It sticks to everything and stains your clothes. Be super-careful with this stuff, and follow the directions on the can.
Here is how I put the slapdash thermal carafe together.
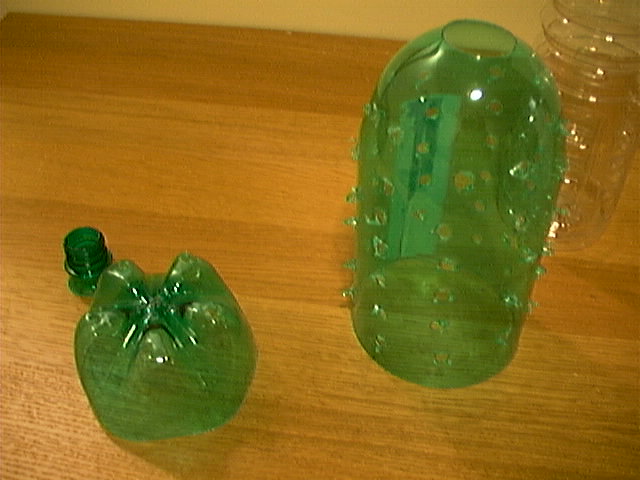
Starting with the two plastic bottles, I used the razor saw to cut off the top and bottom of the large bottle. The top gets discarded. The bottom with be re-attached later. I also removed all the labels.

Click to embiggen
Next, I drilled holes all over the larger bottle. Actually a better idea is to use a knife to cut little flaps. This is easier to do, and it allows the holes to be closed more neatly when the project is complete. The holes are required, because the expandy foam needs some exposure to air in order to cure properly, plus it needs an escape route if it expands too much. (I learned this fact through bitter, bitter experience.)
Click to embiggen
Now, my smaller bottle's mouth was a little too large to fit in the hole left by cutting the neck off of the larger bottle, so I used scissors to cut radial lines around the top hole. This made it possible to snap the smaller bottle into the larger bottle. Conveniently, the small bottle has a ring around its neck to help hold it in place.
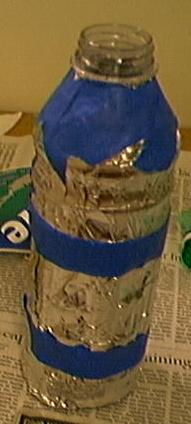
This is also the time to wrap the small bottle in foil (shiny side facing in). Bitter experience taught me to use the minimum amount of foil possible and to bind it tightly with tape. A thicker layer of foil will enable a certain amount of heat loss through conduction.
Click to embiggen
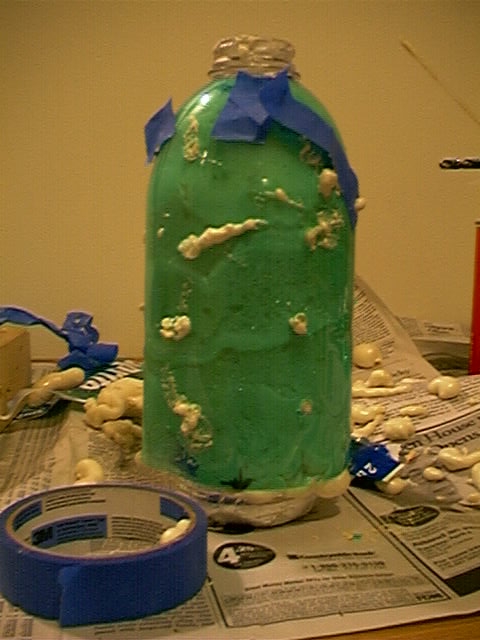
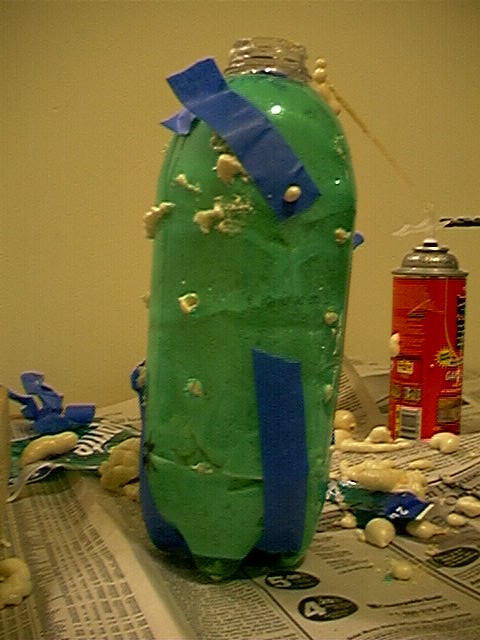
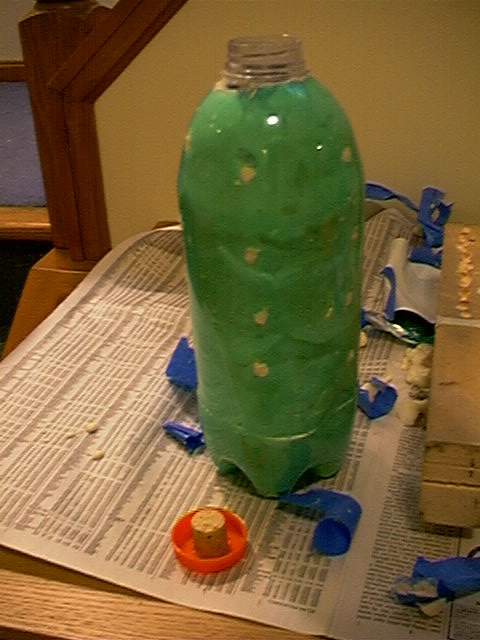
With the smaller bottle snapped inside the larger one, it is time to carefully fill the space in between the bottles with expandy foam. I found it best to work slowly, spraying in a tiny amount of foam and letting it dry completely before adding more. Trying to do the whole bottle at once didn't give the foam enough space to expand or breathe, and instead of drying to a hard, porous substance, it sort of languished in a sticky, oily, not-very-insulative goo.
Click to embiggen
I used tape to seal up the place where I didn't want the foam to come out. Also, I had to firmly tape the bottom of the large bottle back to its body to prevent the foam from forcing it apart.
Just as a warning: if expandy foam gets where you don't want it, the best thing to do is let it dry completely, then break it off. There might be some scraping involved. The same advice applies to getting it on your skin. If it's on your hands, don't touch anything, or that will get sticky too. You can run cold water over the affected area to help firm it up, but expect it to remain tacky for several hours. Bitter experience has taught me that it is preferable to prevent accidental exposure to expandy foam than to clean up after it!
After the expandy foam is thoroughly dried, it's time to remove the tape and slice off all of the foam that oozed out of the holes. In the foreground of this picture, you can see that I attempted to insulate the cap by gluing a cork to the inside, but that turned out to come unglued pretty quickly in the presence of hot liquids, so I trashed that idea and glued craft foam to the outside of the lid instead.
Click to embiggen
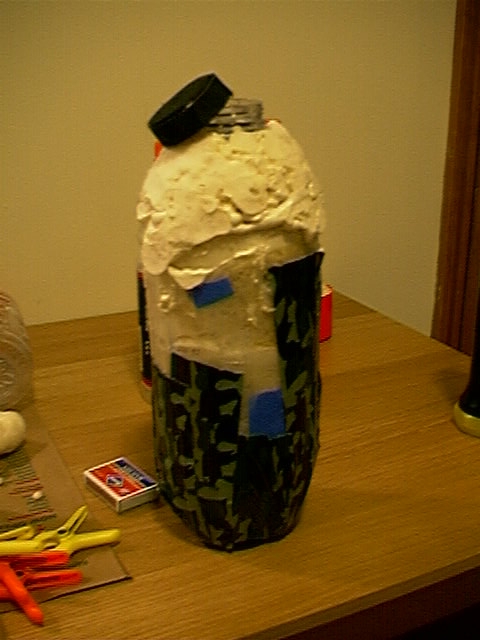
It was more or less at this point in the construction that I tested the slapdash thermal carafe against its brand-name counterpart. Based on the results of that test, I made a few modifications. For example, the insulation near the top of the bottle was quite thin, so I added some foam to the outside of the bottle. You can also see the black foam that I glued onto the lid in this photo.
Click to embiggen
Because 2 liter bottles have that funky shape on the bottom that makes them tip over easily, I found a plastic container that I was able to graft on to the bottom of the carafe in order to make it flatter.
Click to embiggen
Finally, I gave the carafe an external skin of camouflage duct tape. (Note: this is a second bottle that lacks the flat bottom.)
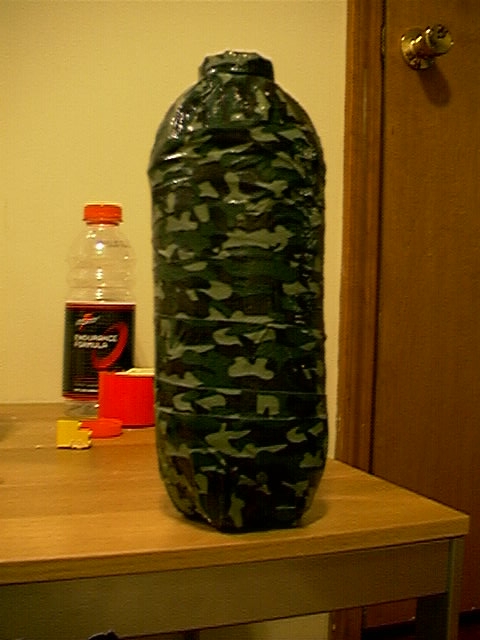
Click to embiggen
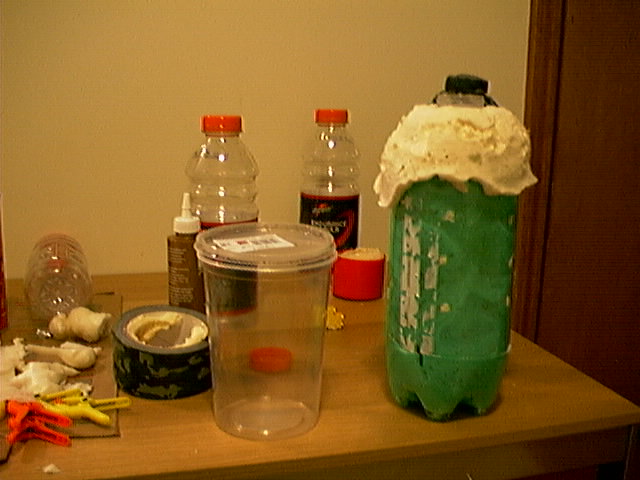
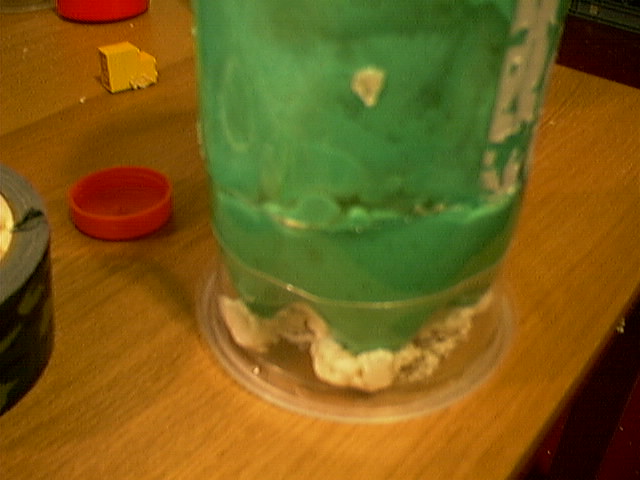
Since I was developing thermos-building expertise by trial and error, it meant that I had some spare parts and failed experiments lying around. In fact, I ended up building three complete carafes, but I only ended up keeping one of them. I bisected one of the rejects in order to produce a cutaway view of the complete package.
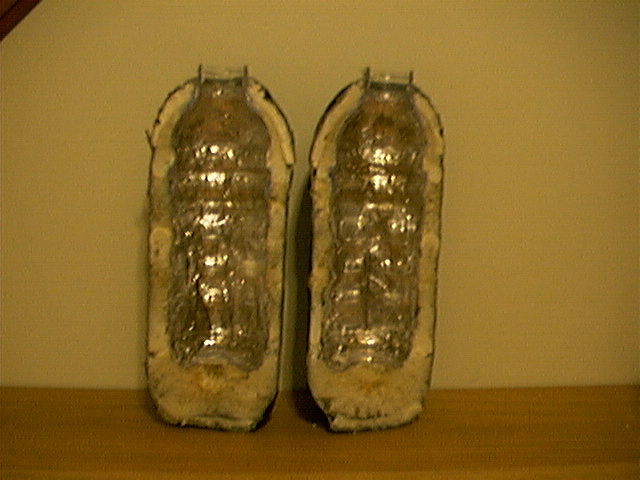
Click to embiggen
Be sure to check out the test results to see how the homemade thermos compares to a real one!

