Front Motor Mount
Mazda Protegé5 Front Motor Mount Replacement
This is not a HOWTO guide. It is a HOWI guide. In other words, it's not how to replace your front motor mount. It's how I did mine.
Disclaimer: Although this page includes a certain amount of advice, it is not intended to supplant manufacturer's instructions or actual mechanical expertise. If you have problems, you should consult an automotive professional, not my Web page. Please don't rely on this narrative in place of a qualified mechanic!
Mazda used pretty soft engine mounts on the Protegé5. These soak up a lot of vibration from the engine as it runs, which gives a smoother ride. Unfortunately, they are soft enough to let the engine move quite a bit within the mounts as the engine speed changes. Some of the power that could be used to move the car is instead spent twisting the engine in its mounts.
Mazda sells a set of replacement mounts that have polyurethane bushings instead of the soft rubber that the stock mounts come with. This upgrades two of the four motor mounts -- the "number 1" mount, which is toward the bottom of the engine, against the firewall, and the "number 2" mount, which is also at the bottom of the engine, in the front near the radiator. Both of these mounts are on the driver's side of the engine. This page describes how I replaced the front engine mount.
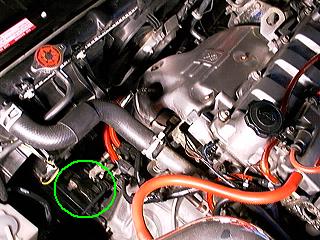
Click to embiggen
The photo attempts to show the location of the front motor mount.
It is very difficult to see either the front or rear engine mount from the top of the engine bay, but some of the photos later on will make it clear where they are.
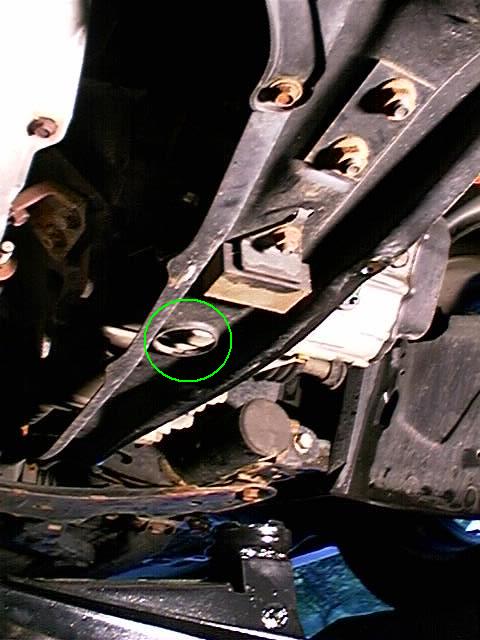
This shot (below) shows the underside of the P5. The green circle shows the two bolts that hold the engine mount in place. In order to work on the mount, though, the plastic panel needs to be removed; it is held in place by five screws. One of the screws is up under the wheel well. There's also a clip up there in the wheel well. I left that clip in place and allowed the panel to hang by it. I figured it was better than risking breaking the clip.
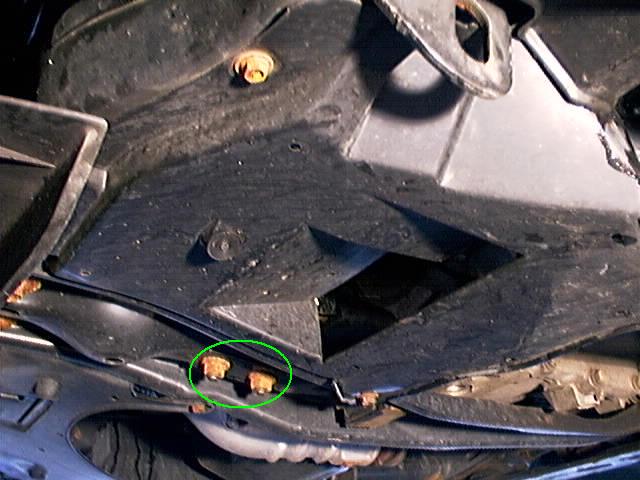
Click to embiggen
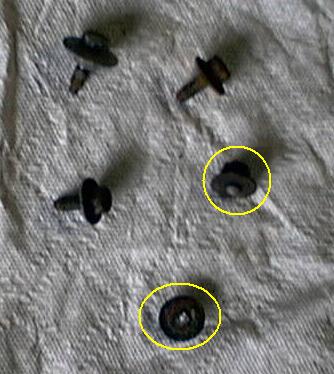
The screws holding the panel in place weren't so lucky. I broke two of the five! I was able to replace one of them with a machine screw, but the other one was stuck in its threads and wouldn't come out, so I'm down one. Here are the dead soldiers:
Click to embiggen
Thanks for serving, guys.
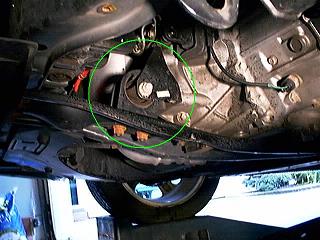
Click to embiggen
With the panel out of the way, it is easy to see the mount (left). The two rusted bolts on the bottom come off; then the white bolt in the center comes out. This leaves the bottom part of the mount free to slide out and get replaced. (The top bracket stays in place.) Then, the same bolts go back on to the new engine mount. Note that the vehicle is up on ramps at this point, so that there's enough space to work under the car.
Click to embiggen
Here is a shot (right) of the subframe (looking toward the front of the car). Mazda was kind enough to provide this jackhole, through which a support can be placed to keep the engine from sagging while the mount is removed. I put a jack in there as a precaution, but I really don't know that it was necessary.

Click to embiggen
This shot (left) shows the old mount on the left and the new mount on the right. It also shows the nuts and the bolt that goes through the center of the mount. The old, rubber mount was very soft, and you could easily squish it around with your fingers. The new one is quite stiff.
Below is the new mount in place. The bolts are brown because I shot them with some rust-proofing primer to slow the decay. The torque spec for the bolts through the frame is 50-68 foot-pounds. No spec is given for the center bolt.

Click to embiggen
All that remains is to replace the plastic panel on the bottom of the car.
Did it make a difference? Yes! An improvement? Sort of.
The most noticable difference with the new engine mount in place is that the car shakes quite a bit when you start it up, and it vibrates a lot at idle speeds. I've noticed that it's a little tougher to start from a stop on a hill.
On the upside, though, it does seem like power hits the pavement a little sooner. Shifts are generally a bit smoother, especially downshifts with engine braking. Somebody on the web wrote that he noticed his freeway-speed RPM was about 300 lower with the stiffer mounts, but I'm not really sure I can say the same thing. I didn't really notice where it was before, so I do not know if it is lower now.
Generally, it has been a worthwhile upgrade, especially considering that engine mounts often wear out during the life of a vehicle, and I'll bet these extra-soft rubber ones would wear out more quickly than most. If you've got to replace them anyway, you might as well do an upgrade at the same time.
I'll post details of the rear mount when I'm finished with the install. It is not going well. The part is quite difficult to reach, and the bolts are on there really tight.

