Plugs and Distributor
1993 Protegé DX Spark Plug, Distributor, and Wire Replacement
This is Page 2 of 4
This is not a HOWTO guide. It is a HOWI guide. In other words, it's not how to replace your plugs, distributor, and wires. It's how I installed mine.
Disclaimer: Although this page includes a certain amount of advice, it is not intended to supplant manufacturer's instructions or actual mechanical expertise. If you have problems, you should consult an automotive professional, not my Web page. Please don't rely on this narrative in place of a qualified mechanic!
The procedure shown here is specific to a 1993 Mazda Protegé DX (SOHC). If you have some other kind of car, the procedure will be different, but probably not too different, especially if you've got an in-line 4 cylinder engine.
New Plugs
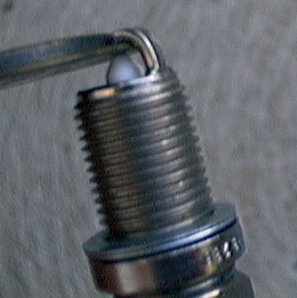
First, I checked the spark plug gaps. For about a dollar, most auto stores sell a tool that checks spark plug gaps. It has a marked ridge of gradually increasing thickness. You slide the plug along the ridge until the gap is filled by the ridge, then read the corresponding mark to determine how large the gap is. If the gap is wrong, the spark plug can be (carefully!) bent with pliers to adjust the gap.
The Bosch plugs came pre-gapped and did not require adjustment.
The spark plug gap should be 0.039 - 0.043 inches (1.0 - 1.1 mm).
Click to embiggen
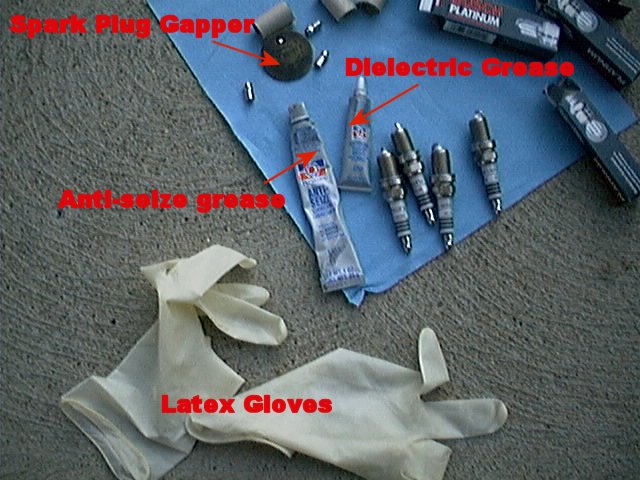
Next I put a bunch of chemicals on the new spark plugs.
Spark plugs have a threaded end that screws into the engine block, and a ceramic end where the electrical charge is applied. The threaded end needs to be coated with anti-seize compound, which is a silver, stinky grease that keeps metals from reacting and becoming stuck. The ceramic end should be coated with dielectric grease, which is clear and odorless and keeps the spark plug boot from getting stuck to the tip of the spark plug. I think it also helps keep electricity from travelling down the outside of the spark plug.
Click to embiggen
I'm not sure how dangerous these greases are, but they are certainly stinky and sloppy, so I applied them using latex gloves.
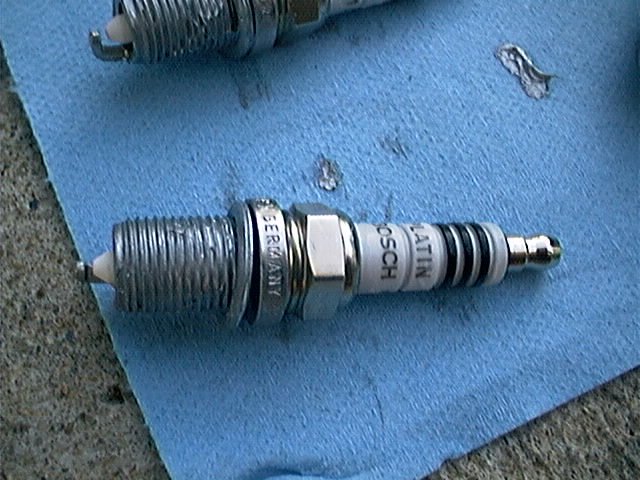
Here's what the plug looks like with the anti-seize on the threads and the dielectric grease on the ceramic.
Click to embiggen
With the plugs prepped, I set them aside and started taking stuff apart.

